
How to?
1 min Read


Nitzan Salingar
VP Product
.svg)
The Cost Center is designed to give you a high-level view of all costs within your opportunity, while supporting how pricing actually works in practice.
It stays tucked on the right side of your screen so you can focus on the quote while keeping your options ready to use or to compare as the quote is ‘Won’. No more guessing which cost was selected or hunting through costs when a supplier invoice arrives.
Click the Cost Center icon on the right side of any opportunity:
.png)
You will see two sections:
.png)
.png)
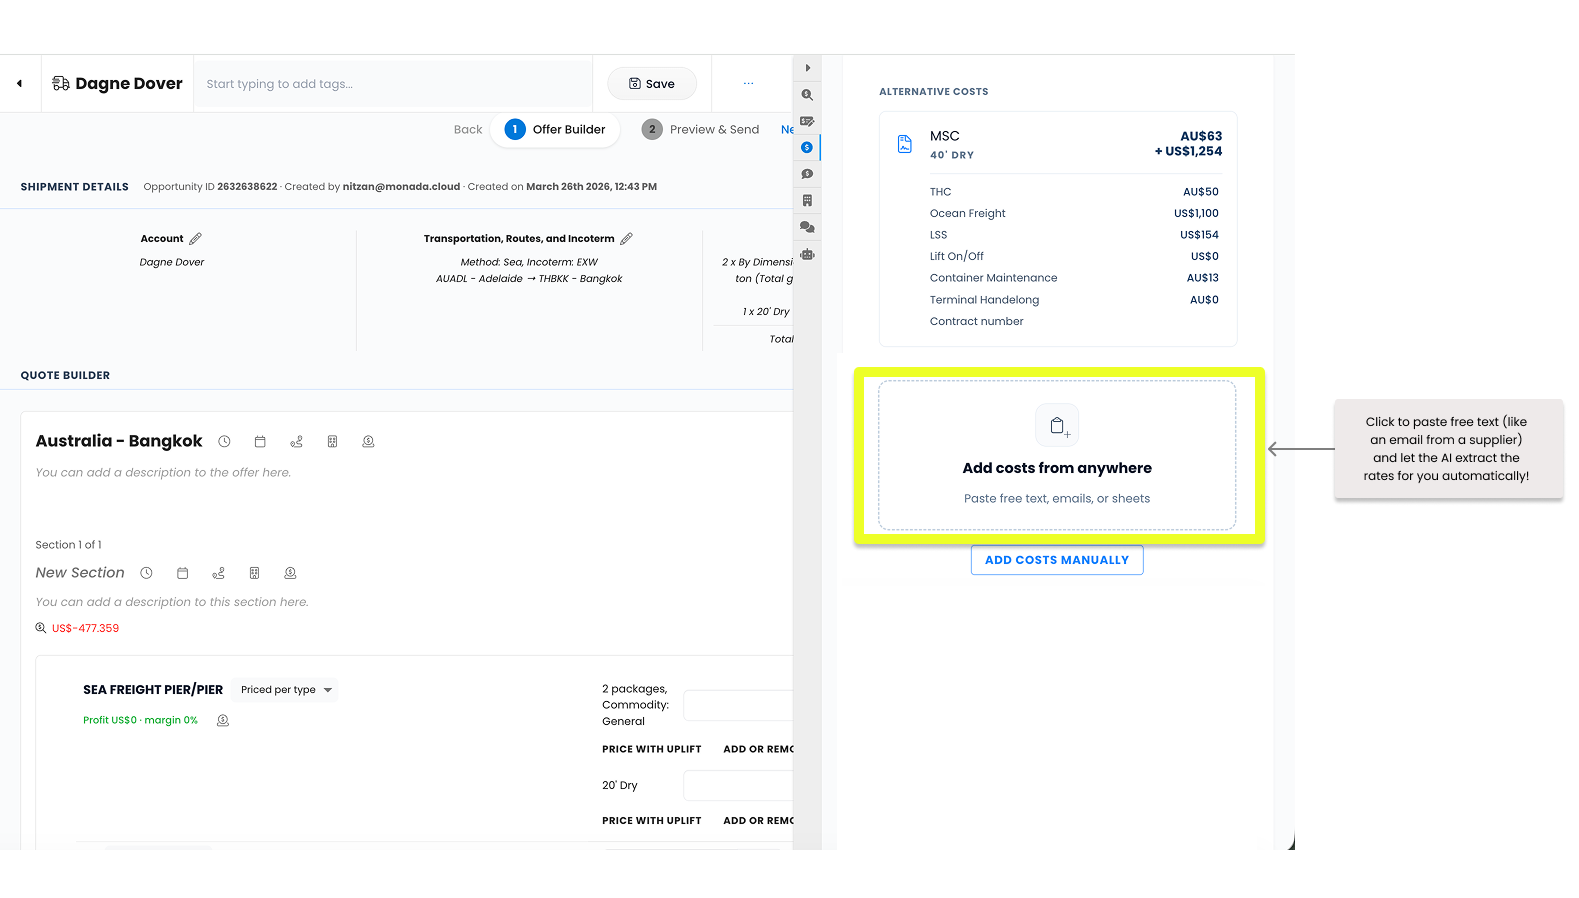
Monada lets you import costs into your opportunity from any source - whether it’s shipping line portals, agent emails, spreadsheets, or any cost you need to quickly add and document in your quote.
1. 'Add costs from anywhere':
Got an offer from a supplier via email or WhatsApp? Simply paste the content into the Cost Center, and the system will parse it, calculate the total, and present a clear, structured breakdown of the supplier’s costs.
2. Add Manually: Click ADD COSTS MANUALLY at the bottom of the Cost Center panel to type in a new cost quickly.
3. RFQ: Email your agents directly from Monada, and the system will process their answers to the cost center. From there you can just Drag&Drop it into the offer:
.png)
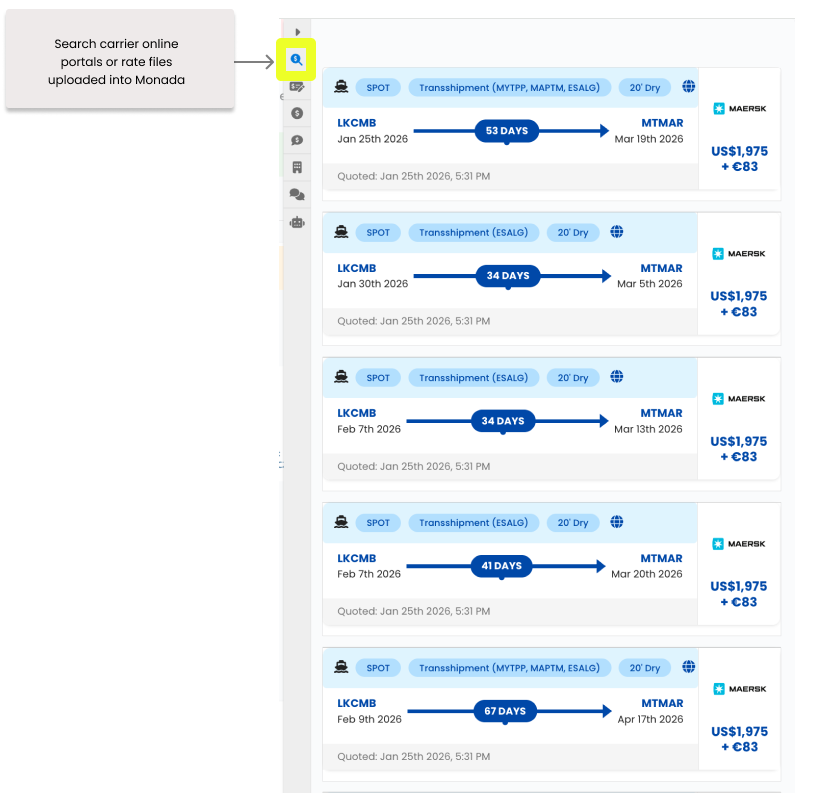
4. Carrier online portals or rate files uploaded into Monada: You can drag and drop to the quote any cost found on our search panel and it will automatically be added to the Cost center.
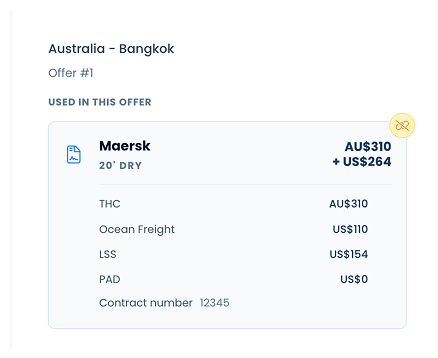
Sometimes plans change, and you need to swap a supplier or remove a cost entirely. We’ve made it easy to move costs around without losing your work.
If you decide not to use a specific cost for the current quote but want to keep it in your "back pocket" for later:
If a cost is no longer relevant at all and you want to scrub it from the system:
Pro-Tip: If you are inside the "Edit Costs" pop-up, you can also use the DELETE FIELD button at the if you want to remove that entire category of cost from the line item.